Understanding Variables in Swift
The only article you need to read to learn everything about variables in Swift.
In today's article, we'll be looking at the concept of variables in Swift.
Variables, in any programming language, is the concept that a programmer learns about in the initial days of learning that language, and understanding it is an important part of gaining a solid grip over that particular language.
Talking about variables in Swift, the concept of variables is very easy to understand and implement.
Let's dive deeper and understand variables in depth.
What are variables?
As the name suggests, variables are something that can vary.
A variable refers to a storage location we reserve in the computer’s memory for some data or value to store that we can change freely & manipulate as per our program's requirements.
How to initialize a variable?
To declare a variable, we use the var keyword, followed by the name we want to give to that particular variable and assign it to something we want this particular variable to store in the memory.
We can store any kind of data type as a variable, whether it may be an integer, float, double, string, boolean, etc.
Let's look at an example:
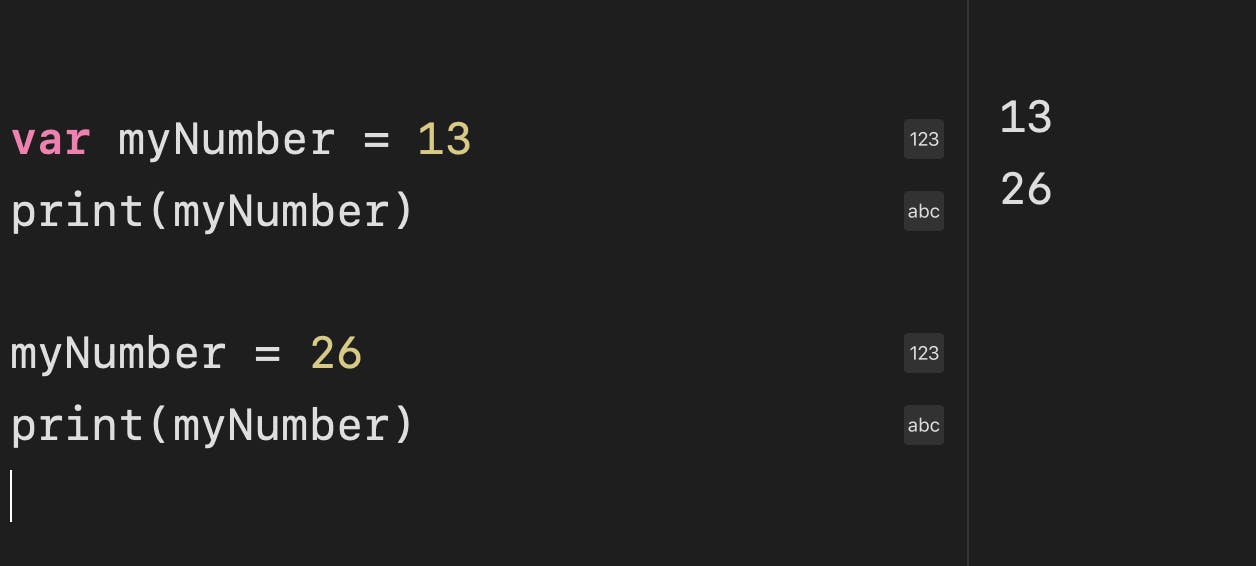
var myNumber = 13
According to this code snippet, we declare a new variable called myNumber that stores the integer value of 13.
Do remember to use the keyword var, otherwise, your program will generate an error.
Now, myNumber, a variable has a value of 13 in the memory.
You may try implementing this on your own on a Swift Playground or some other compiler.

We can perform any kind of operations on this variable like mathematical calculations, building & solving logic, implementing algorithms, etc, just thinking of it as a substitute for the integer 13.
And as we discussed above, we can change or manipulate this value.
myNumber = 26
No need to use the var keyword again as we are trying to modify an existing variable that is already declared earlier.
Now the variable myNumber has the value of integer 26 in the memory.

As you can see, after reassigning the variable to 26, the second print(myNumber) statement prints out 26 in the console.
IMPORTANT NOTE
If we are reassigning the variable to a new value, the new value should be of the same data type of which the variable was earlier declared for:
var myAge = 18

myAge = 19
The above code snippet is valid in the Swift program as we are reassigning an integer 19 to the variable, which was earlier initialized with a value of integer 18. The data type at both times of initialization was an integer, making this program valid.
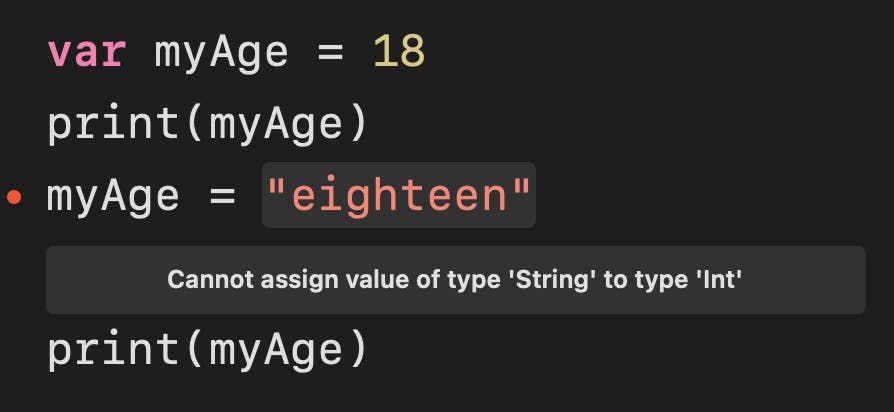
Whereas in the following code snippet, an error will be generated:
var myAge = 18

myAge = "eighteen"

As you can see, the Swift compiler shows us an error that it cannot assign a variable of type string to a variable that was earlier assigned an integral value.
Keep this in mind, and you are good to go :)
Some examples with other data types:
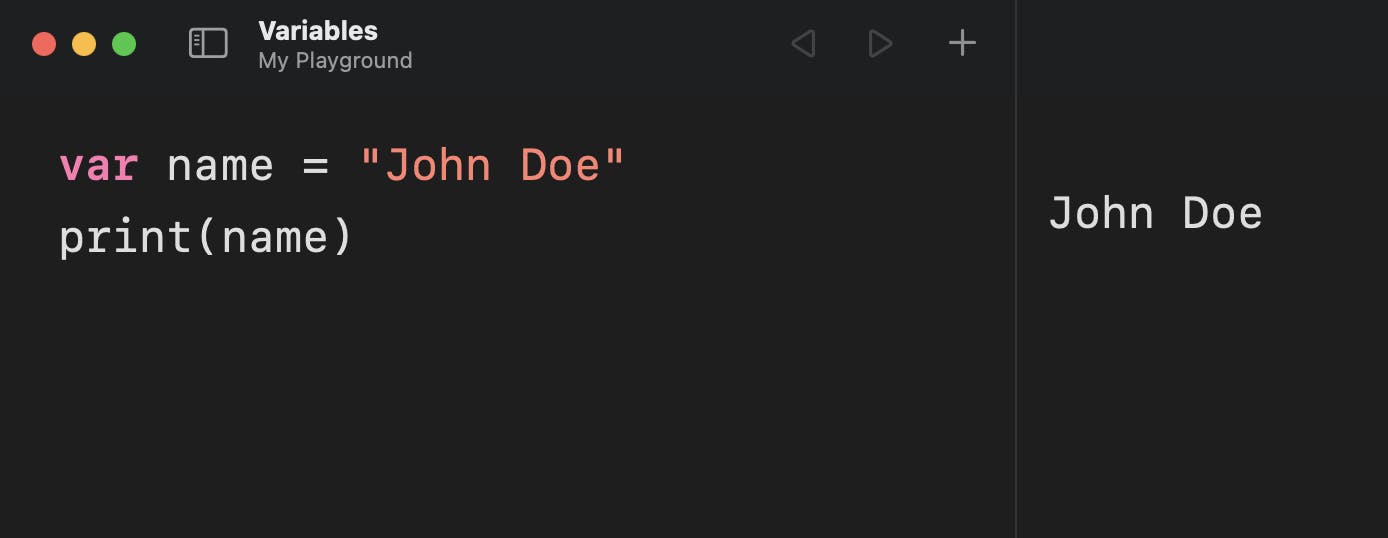
var name = "John Doe"
print(name)
In this example, we store a variable of type string "John Doe" in the variable name and then we print it.

var isAdult = false

var isStudent = true
In this example, we initialize two variables and store a boolean value in them.
var myScore = 9.4
In this example, we store a floating value in the variable myScore.
You may try more examples on your own by storing and experimenting with other data types.
Good to know: We can explicitly declare a variable's data type to define what kind of data we want it to store in it.
Example:
var myAge:Int
myAge = 18
Here, we are explicitly telling the compiler to make sure that the variablemyAge always stores an integer value only.
So now you also have an idea of explicitly declaring the data type of a variable.
Since we already know that if we directly initialize a variable to some data type, it'll always store that kind of data type only in future re-assignments, you may avoid explicitly declaring data type unless it's absolutely necessary.
So that's all for this article. You now have a deep understanding of variables in Swift. Hope you have understood what I wanted to convey.
Thank you for reading this far.
Check out more at ishaanbedi.me

